

Programming, graphics, games, media, C++, Windows, Internet and more...
Entries for tag "rendering", ordered from most recent. Entry count: 187.
Pages:  1 ... 8 9 10 11 12 ... 24

# My 2D Software Renderer
Tue
18
Aug 2009
I've been recently working on rendering 2D primitives in pure software, without any hardware acceleration. Sure It's about foundations of computer graphics, but I did it just for fun. External libraries I've used are DevIL to read bitmap files (like TGA) and FreeType to read and render font files (like TTF). I compose graphics in my software renderer to my "surface" in RAM and finally present it on the window with SetDIBitsToDevice function. As you can see I've managed to reach real-time performance, despite I haven't done any advanced optimizations like MMX, SSE or multithreading.
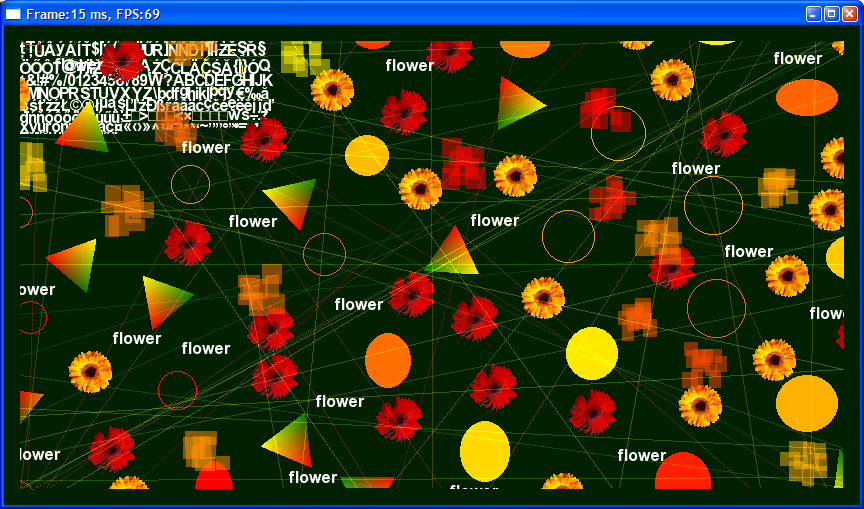
My renderer supports drawing rectangles, lines, polygons, circles, ellipses, triangles, blitting bitmaps, as well as scissor test (clipping to rect), alpha test and alpha blending. Here is how the renderer interface looks like:
Comments | #rendering #productions Share
# Cascaded Shadow Mapping
Sun
12
Jul 2009
When I was writing The Final Quest engine for my master thesis, I didn't manage to implement any technique to ensure good quality shadows in outdoor scenes. I've read about all these kinds of perspective reparametrization like PSM (Perspective Shadow Maps), LiSPSM (Light-Space Perspective Shadow Maps), TSM (Trapezoidal Shadow Maps) or XPSM (Extended Perspective Shadow Maps) and all that math behind them seemed very scary to me. Today I know that complexity of these techniques also causes some artifacts in particular cases and commercial games more often use simpler technique called CSM (Cascaded Shadow Maps).
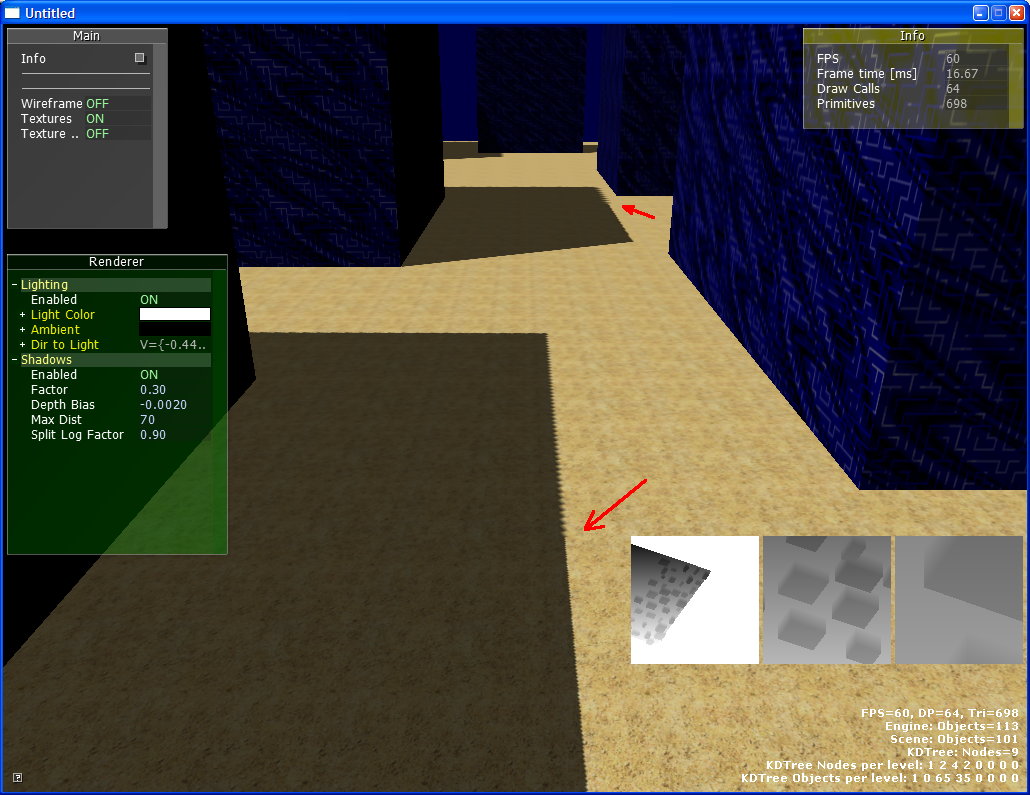
Yesterday I've implemented CSM and I'm very glad with the results. Of course there are always some artifacts, aliasing problems and z-acne on some distant objects under particular surface angles, performance degradation (additional objects rendering to 3 x 1024 x 1024 textures must take some time) etc., but still its the first time I have not so bad outdoor shadows in my code. On the screenshot below you can see transitions between cascades marked with red arrows.
Comments | #directx #rendering Share
# KD-Tree
Thu
09
Jul 2009
People at forums are usually advised to learn BSP, quadtree or octree as space partitioning data structure, but there are many more interesting structures than these three. This time my choice for home project is KD-tree. It's actually something between BSP and octree. Just like BSP it's a binary tree (each non-leaf node has two child nodes) and optimal splitting plane is estimated each time by special algorithm, but splitting planes are always aligned to one of three main axes and thus each node can be described by an AABB (axis-aligned bounding box), just like in octree.
As my tree is designed to manage objects and not geometry, nothing can be split and some of objects may intersect splitting planes. How to deal with them? I simply assign them to the parent node, so not only leaves are allowed to contain list of objects. To avoid too many small objects intersecting splitting planes to degrade performance by falling into top level nodes (it's called "sticky planes" or something like that :) I adopted "loose octree" idea to my KD-tree. It simply means I extend each node’s bounding box so that each node's children slightly overlap each other and small objects intersecting splitting plane fall into one of the children.
My KD-tree is also dynamic, which means it reorganizes itself as objects get added, removed and moved in the tree. It's actually quite simple. Each time an object is added to a node, that node can be split into two children if it's object number exceeds constant limit. Similarly node can be merged by deleting it's children each time an object is removed from one of its children, if the number of objects in that node and its children drops under constant minimum.
For additional performance, I allocate tree nodes from my own "Free List" memory pool and I keep objects connected to each node as doubly-linked list.
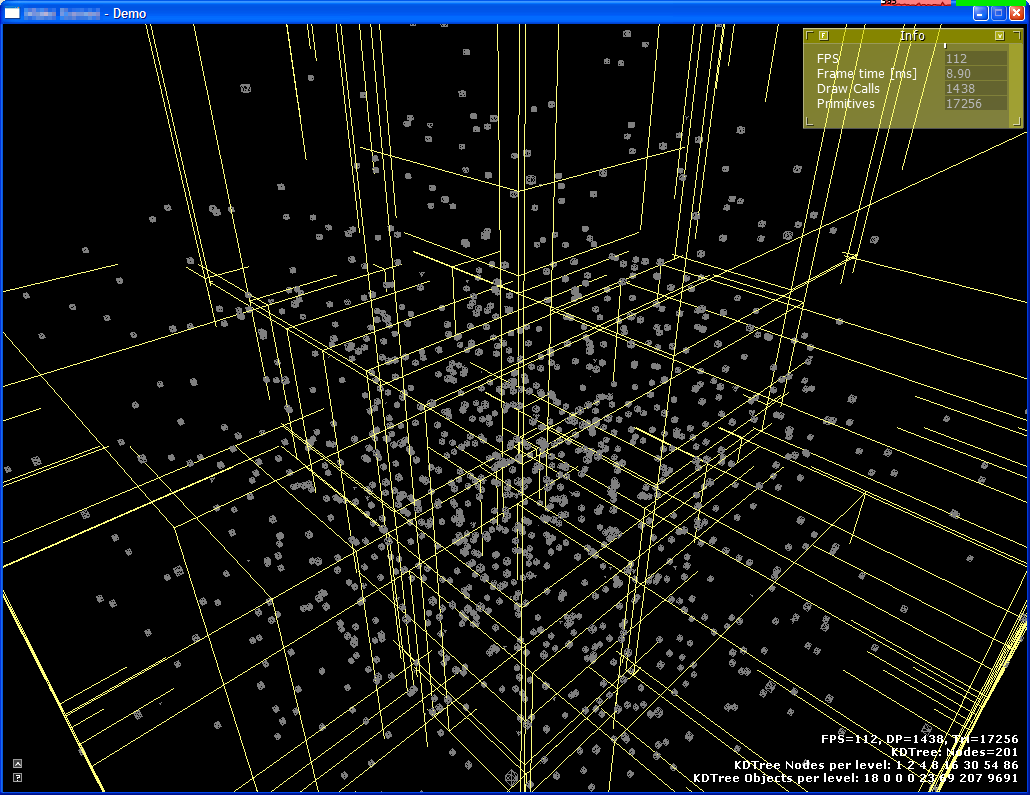
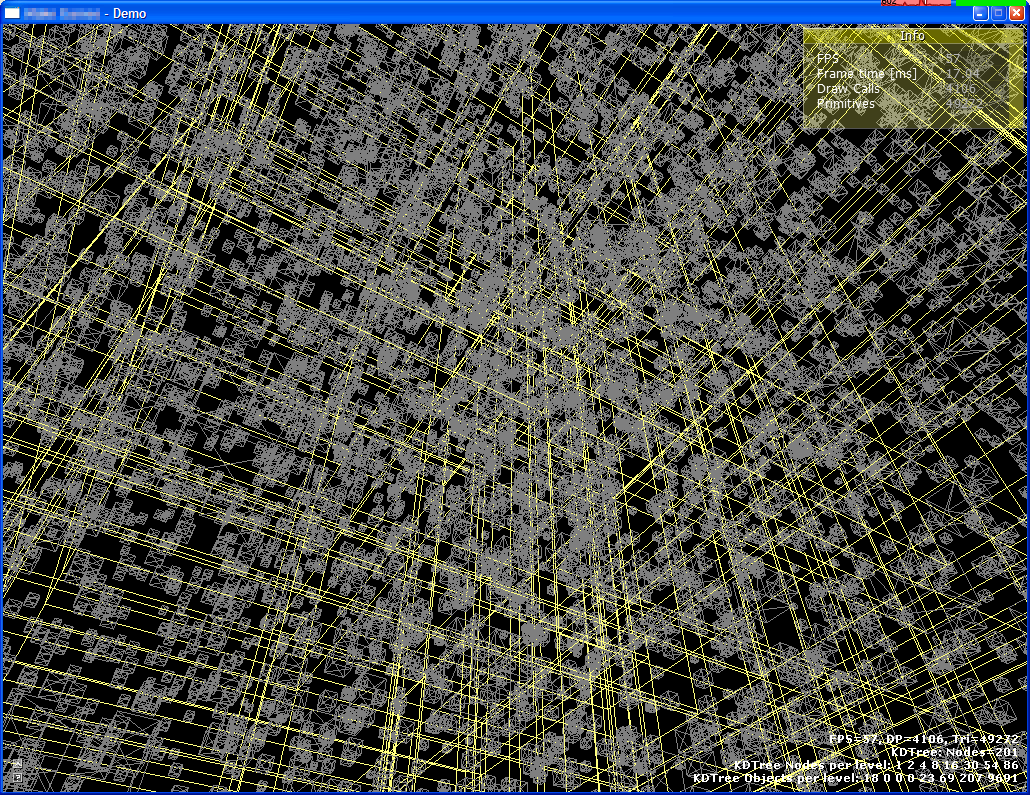
I also came up with an idea how to easily visualize quality of my space partitioning technique. I keep track of the number of tree nodes and objects on each depth level. This way I can tell from these several numbers whether tree is more "tall" or "wide" and whether most of objects stay in leaves instead of some top-level nodes.
Here are some screenshots and a video from my recent code:

Comments | #rendering #video #gallery #algorithms #math Share
# Thoughts on Display Settings
Tue
23
Jun 2009
I've decided to make a demo for this year's Riverwash demoscene party. For that purpose recently I've prepared my framework and coded loading of display settings from either command line parameters, configuration file or my brand new dialog box:

Coding it reminded me of my thoughts about display settings from user's versus programmer's perspective. User is usually able to change screen resolution and sometimes also change refresh rate, turn vertical synchronization on/off, toggle between fullsreen and windowed mode, choose antialiasting, texture filtering quality and some general quality/performance parameters. On the other hand, programmer passes bunch of parameters to Direct3D as D3DDPRESENT_PARAMETERS structure and other arguments to functions CreateDevice and Reset. The question is how to map between these parameters?
Here are my current beliefs on this subject:
[+] Adapter: I just pass D3DADAPTER_DEFAULT constant. Sure it would be better to give a choice of an adapter (one can enumerate adapters using IDirect3D9 methods), but it's useful only on multi-monitor systems and not many games expose such setting.
[+] DeviceType: I always pass D3DDEVTYPE_HAL. Using software reference rasterizer D3DDEVTYPE_REF makes no sense, as it gives SPF instead of FPS :)
[+] BehaviorFlags: Now I always pass D3DCREATE_HARDWARE_VERTEXPROCESSING. Using software or mixed verex processing made sense only on old hardware, especially on old Intel laptop graphics chips, which had Pixel Shader 2.0 but no Vertex Shader at all.
[+] BackBufferWidth, BackBufferHeight: I give a choice of display modes available on default adapter with format hardcoded as constant (D3DFMT_X8R8G8B8). One can enumerate available display modes using IDirect3D9 methods. In windowed mode it could also be reasonable to be able to set any given resolution (Width and Height as text fields), as well as manually resize application's window.
[+] BackBufferFormat: I just use D3DFMT_A8R8G8B8. Choice between X8R8G8B8 and A8R8G8B8 just the matter of having additional fourth channel available (alpha), which is obviously not visible, but can be written, used in alpha blending and thus utilized to do some special effects (like masking intensity of some effect in screen space).
[+] BackBufferCount: I just give 0 here, which resolves to default value of 1 back buffer. I'm aware that using value 2 can change the way rendering is performed a bit.
[+] SwapEffect: I always use constant D3DSWAPEFFECT_DISCARD, as it is the fastest one. It says that entire content of the back buffer can be discarded after frame was presented and program have to render new frame from scratch (which is what we always do in game development).
[+] AutoDepthStencilFormat: Direct3D defines many of them, but for real all the D3D9 generation hardware supports only three: D3DFMT_D16, D24X8 and D24S8. So the choice is only based on the decision whether we need higher, 24-bit precision or stencil buffer.
[+] Flags: For the best performance possible I always give D3DPRESENTFLAG_DISCARD_DEPTHSTENCIL and never give D3DPRESENTFLAG_LOCKABLE_BACKBUFFER.
[+] FullScreen_RefreshRateInHz: Nowadays, when many (most?) people have LCD displays, standard refresh rate is 60 Hz and maybe 75 Hz. In the CRT era setting good refresh rate was crucial for playing comfort and thus it was very annoying when a game didn't expose setting of refresh rate, but used default 60 Hz instead. I believe refresh rates should be enumerated and given as a choice next to the resolution.
[+] PresentationInterval: This is the value the "VSync" setting is converted to. It looks like D3DPRESENT_INTERVAL_DEFAULT behaves as VSync turned on (FPS <= RefreshRate) and D3DPRESENT_INTERVAL_IMMEDIATE means VSync off (FPS as high as possible), but once during my experiments I've observed that flag D3DPRESENT_INTERVAL_ONE behaves slightly different than D3DPRESENT_INTERVAL_DEFAULT (I can't remember the details now).
I know I would sound more "professional" if I considered all other constant values available and their possible uses, but I don't care :) My point here was to simplify the problem to be able to map these technical parameters to the display settings exposed to the user. Multisampling is separate subject so I don't cover it here.
Comments | #demoscene #directx #rendering Share
# ASCII Art in Pixel Shader
Thu
18
Jun 2009
Today I'm going to show completely ugly and useless effect :) I have always been fascinated with ASCII art, so I'm glad I am now able to visualize it on GPU. Here is the final effect:

And here is how I've made it. First, I took a 3D scene with some untextured boxes.
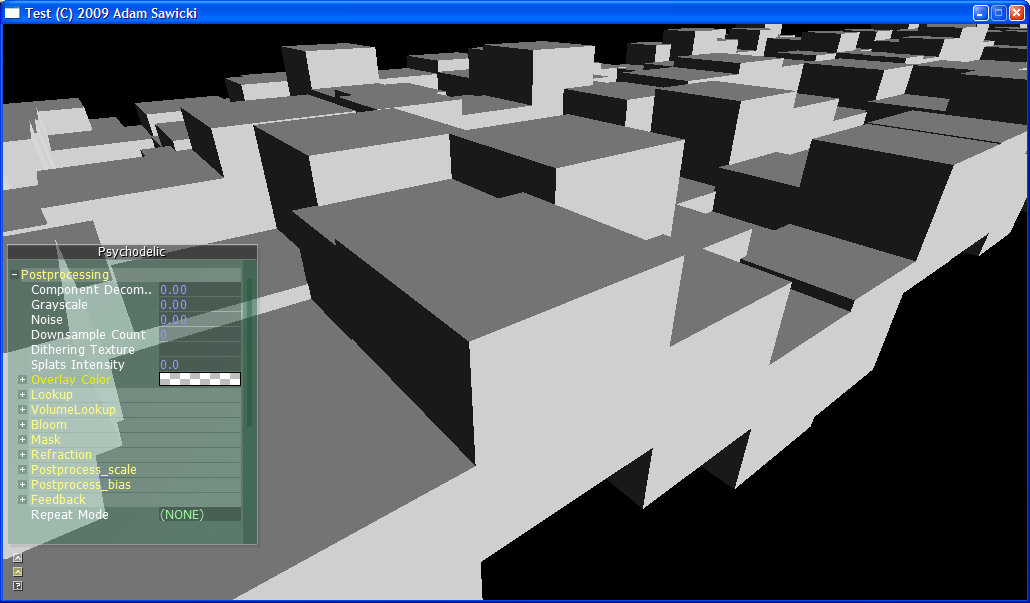
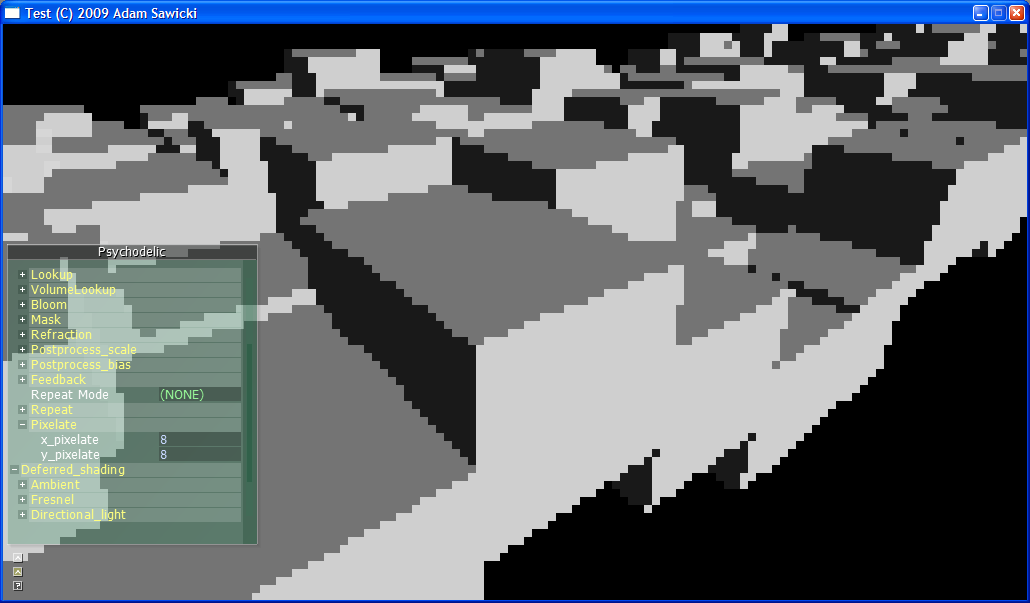
Now I do pixelate effect to have my image looking like each 8 x 8 pixel group have same color. Optimally I should render whole scene into 8 x 8 times smaller render target and rewrite it with POINT filtering, but currently I'm just doing some processing during rewriting this image from render target texture to the back buffer. That processing is simply rounding texture coordinate down to a multiply of 8 texels:
// in float2 TexCoord : TEXCOORD0
// float2 g_PixelateParam = float2(BackBufSizeX / 8, BackBufSizeY / 8)
TexCoord = floor(TexCoord * g_PixelateParam) / g_PixelateParam;
float4 Color = tex2D(RenderTargetSampler, TexCoord);
Then for each pixel I calculate its luminance using weighted average of RGB values:
float Grayscale = dot(Color.rgb, float3(0.299, 0.587, 0.114));
And finally I'm doing a lookup into specially prepared volume texture. XY coordinates are taken from texel position in screen space, while Z (depth) coordinate is just the pixel luminance.
float2 TexXY = (Pos-float2(0.5,0.5))/g_VolumeLookupTextureSize.xy;
float  TexZ = Grayscale;
float4 VolSample = tex3D(VolumeLookupSampler, float3(TexXY.x, TexXY.y, TexZ));
Color.rgb = VolSample.rgb;
The texture is prepared so that its subsequent slices contain ASCII characters: from empty black image, through dark gray dot on black background, dark gray comma, colon, until white hash on light gray background and finally blank white image. Here you can download this texture (I've made it using GIMP and DirectX Texture Tool): Atari Font.dds.

To make it pixel-perfect, I had to bias XY texture coordinate by (-0.5, -0.5) texels, as well as turn off texture filtering:
Dev->SetSamplerState(3, D3DSAMP_MINFILTER, D3DTEXF_POINT);
Dev->SetSamplerState(3, D3DSAMP_MAGFILTER, D3DTEXF_POINT);
It also turned off smooth transitioning between slices in volume texture (it means ASCII characters are not blended together), It's what I actually wanted to do, but by the way I realized that we cannot switch filtering for separate texture coordinate axes (e.g. only UV or only W), just like we do with addressing modes (D3DSAMP_ADDRESSU and so on). It could be useful sometimes... Anyway, we can achieve that with pixel shader.
# Dithering i inny postprocessing
Thu
11
Jun 2009
Dziś dalej bawiłem się w pisanie efektów postprocessingu. Szczególnie zainteresował mnie Dithering. Ta technika była stosowana do polepszania jakości obrazów w czasach, kiedy komputery dysponowały ograniczoną liczbą dostępnych kolorów. W szerszym kontekście Dithering oznacza celowe wprowadzanie szumów do sygnału celem zniwelowania nieprzyjemnego efektu powstającego w wyniku kwantyzacji do pewnej, małej liczby możliwych wartości (np. tylko kilka bitów na składowe RGB piksela czy próbkę dźwięku).
Dzisiejszy DirectX już nawet nie obsługuje palet, ale pomyślałem sobie, że napisanie takiego efektu renderowanego w czasie rzeczywistym za pomocą shaderów to będzie ciekawa część poznawania zagadnień związanych z tematem efektów pełnoekranowych i Non-Photorealistic Rendering.
Zasada działania takiego efektu jest stosunkowo prosta. Jeśli w kodzie shadera HLSL mamy dany kolor piksela Color.rgb, to możemy zmniejszyć precyzję każdego kanału do tylko 2, 3, 4 itd... możliwych wartości (g_DownsamplingFactor) za pomocą takiej operacji:
float Bias = 0.5;
Color.rgb = floor(Color.rgb * g_DownsamplingFactor + Bias) /
  g_DownsamplingFactor;
To 0.5 służy do zaokrąglenia części ułamkowej, zamiast jej obcięcia. Jeśli teraz to przesunięcie 0.5 zastąpimy przesunięciem losowym w zakresie 0..1 (bez wartości skrajnych), to otrzymamy Dithering. Oto efekt:

Comments | #graphics #rendering #tools Share
# Czcionki z komputera Atari
Tue
09
Jun 2009
Współcześnie "Atari" kojarzy się z wydawcą gier, ale kiedyś pod tą marką produkowane były komputery - w czasach, zanim jeszcze pecet podbił świat. W sobotę byłem na imprezie demoscenowej poświęconej miłośnikom klasycznych platform (przede wszystkim, jak się okazało, 8-bitowych Atari). Na tym spotkaniu m.in. wykłady miał TDC. Dowiedziałem się z nich bardzo dużo o budowie i możliwościach sprzętu tamtej generacji (w tym układu graficznego), ówczesnym oprogramowaniu i rynku gier. Okazuje się, że Wolfenstein i Doom wcale nie były pierwsze i że bardzo dużo działo się już w czasach, kiedy mnie jeszcze nie było na tym świecie :)
Przy okazji trafiłem na polskie strony poświęcone Atari - atari.area i Atari Online, a na nich znalazłem kolekcję czcionek z tej platformy: [1], [2]. W przypływie dziwnej ochoty (zapewne spowodowanej niewyspaniem) postanowiłem dopisać wsparcie dla nich do swojego domowego projektu (pisanego oczywiście na PC i w DirectX).
Specyfikacji formatu pliku FNT nigdzie nie znalazłem, ale udało mi się go rozgryźć samemu. To z resztą nie było trudne, jeśli wiadomo, że taki plik ma 1024 bajty, a zawarta w nim czcionka to 128 znaków bitmapowych po 8x8 pikseli monochromatycznych. W końcu 128*8*8 = 8192 b = 1024 B :) Toteż napisałem samemu specyfikację tego formatu: Atari Font FNT File Format.txt, a czcionki z wyżej wspomnianej strony (razem ze screenami) pozwoliłem sobie spakować i udostępnić jako jedno archiwum, żeby łatwiej było ściągać - Atari_Fonts.zip. Przykładowa czcionka (jedna z 335) o nazwie "Atari" wygląda tak:

A efekt mojego kodowania prezentuje się tak (niezły oldschool :D)

Comments | #events #gui #rendering #gallery #demoscene Share
# Non-Photorealistic Rendering
Thu
04
Jun 2009
Szukając informacji na temat cieniowania kreskówkowego (Cell Shading) stwierdziłem, że temat renderowania obrazów stylizowanych, nie dążących do fotorealizmu, jest badany od wielu lat i stanowi obszerną dziedzinę. Dwa linkowiska zbierające sporo publikacji na ten temat to: Stylized Depiction in Computer Graphics, Non-Photorealistic Rendering.
Mnie szczególnie wpadł w oko artykuł A Non-Photorealistic Lighting Model For Automatic Technical Illustration (Amy Gooch, Bruce Gooch, Peter Shirley, Elaine Cohen, SIGGRAPH 1998). Autorzy przedstawili bardzo prostą, ale ciekawie pomyślaną technikę cieniowania stawiającą na czytelność ilustracji technicznych. Żeby ją zastosować, trzeba pomieszczać zwykłe oświetlenie światłem kierunkowym (Diffuse + Specular, brak cienia) z przejściem od kolorów ciepłych w stronę światła (żółty) do zimnych w stronę przeciwną (niebieski) i do tego dodać wykrywanie krawędzi.
Napisałem sobie coś takiego i wyrenderowałem śrubkę. Model znalazłem na tej stronie.
